cld-advanced-concepts
Cloudinary Advanced Concepts
This repository supports the Cloudinary Advanced Concepts course. The course is designed to be run in workshop mode. You can run all of the code locally using this repository.
Download or fork this repository so that you can work along with the code.
Create a free Cloudinary training account
You can create a new, free account on Cloudinary by adding +training to your email when registering.
Sign up here
For example, I can create a training account with this email:
me+training@gmail.com
Be sure to check your email to confirm your new account.
This is important, as we’ll be configuring settings and using Cloudinary add-ons.
Code
The notes below will help you get setup to write and execute code. We’ll be using
- node.js/npm
- html/css/javascript
Node/NPM
Install the latest version of node.js/npm to follow along with node exercises. Download node.js and npm. You must be at Node.js Version 10 or greater.
You can update node/npm with this command: npm i npm@latest -g
Your result should look something like this:

NOTE: You can use yarn to install npmjs.org packages as well as npm.
The Vue.js CLI
We use a positioning app to experiment with transformation positioning. The app is written in Vue.js. If you want to run this app locally, you can install the Vue.js CLI.
Vue.js CLI Installation Instructions here
You will run install globally with this command: npm install -g @vue/cli.
Note: You’re not installing Vue.js globally, just a package with the CLI.
The will allow you to start a local server in the overlay-underlay/positioning-app directory:
npm run serve
You can all run this on the training server: positioning app
IDE
We’ll be using Visual Studio Code to manage code in demos.
A text editor will work, but we recommend these IDE’s for working with JavaScript as well:
Setting up an HTTP Server
I’ll be using Visual Studio Code with the Live Server extension to serve HTML files on localhost.
Another alternative to using the VS Code live server extension is to install the npm http-server
npm i -g http-server
and open the server from the terminal with
npx http-server
If you’re using a Mac, you can use the built in python server
python -m SimpleHTTPServer 8000
Assets
This repo contains code and assets used for the course exercises. The files can be served from github.io. This is useful when we’re working on modules like auto-upload/fetch where we need to fetch remote assets. For example:
https://cloudinary-training.github.io/cld-advanced-concepts/assets/images/cc0.png.
You’ll find media for images, video and raw (any file format besides images and video) in the assets directory. There is no specific security attached to the secure-assets directory. This is just a name to help with an exercise.
(Optional) If you want to serve your account repo on github.io, I recommend forking or duplicating this repository into your own GitHub account. Forking allows you to pull from upstream later if you want. Go to GitHub Settings and set up gh pages to serve the static HTML files and assets.
.env
Your .env file is .gitignored and can’t be accidentally checked into a repository
because it will contain your API_SECRET.
In the root of the project, you’ll find a .env.template file.
Copy it to an .env file and add your information:
cp .env.template .env
This link will take you to the Console, where you can copy the Cloudinary URL into your buffer: https://www.cloudinary.com.
The .env file should contain the CLOUDINARY_URL and a USER_NAME which is the email you used to sign up for the account.
CLOUDINARY_URL=<cloudinary URL from console>
USER_NAME=<cloudinary account email>
How to Run the node.js scripts
Before running any scripts you need to run npm install in the terminal in the directory containing the package.json.
You may want to run npm install in all the subdirectories prior to starting the
course. This can guarantee you are ready if you are accessing the course in a
network where npm install may be blocked.
These are the directories that contain a package.json and need their own npm install:
- signing-widgets/bonus
- signing-widgets/server
- user-upload-workflow/remote-functions
- video-player/react
- overlay-underlay/positioning-app
All scripts (unless otherwise noted in a module) can be run from the root of the project in the terminal.
If I want to run a script in the /access-control directory to upload a private asset, I
can run it from the terminal like this from the root directory:
node access-control/private/upload-private.js
Test your setup
Test that your environment variables are setup correctly:
node test-env.js
Test that you can upload assets:
node test-upload.js
We use the JavaScript React framework in the module on Video Player, as questions come up about how to include widgets and player in frameworks. The code in the React example is very similar to what you would use in a static HTML page. The code for Vue.js and Angular would be similar.
CDN and Browser Caching
In this course, we’ll be concerned about browser caching and CDN caching. Understanding the flow of requests through the CDN and into Cloudinary’s system storage will help. It’s also helpful to be able to identify if you are caching in the CDN and to eliminate browser caching.
You can use the Cloudinary Media Inspector to detect browser caching.
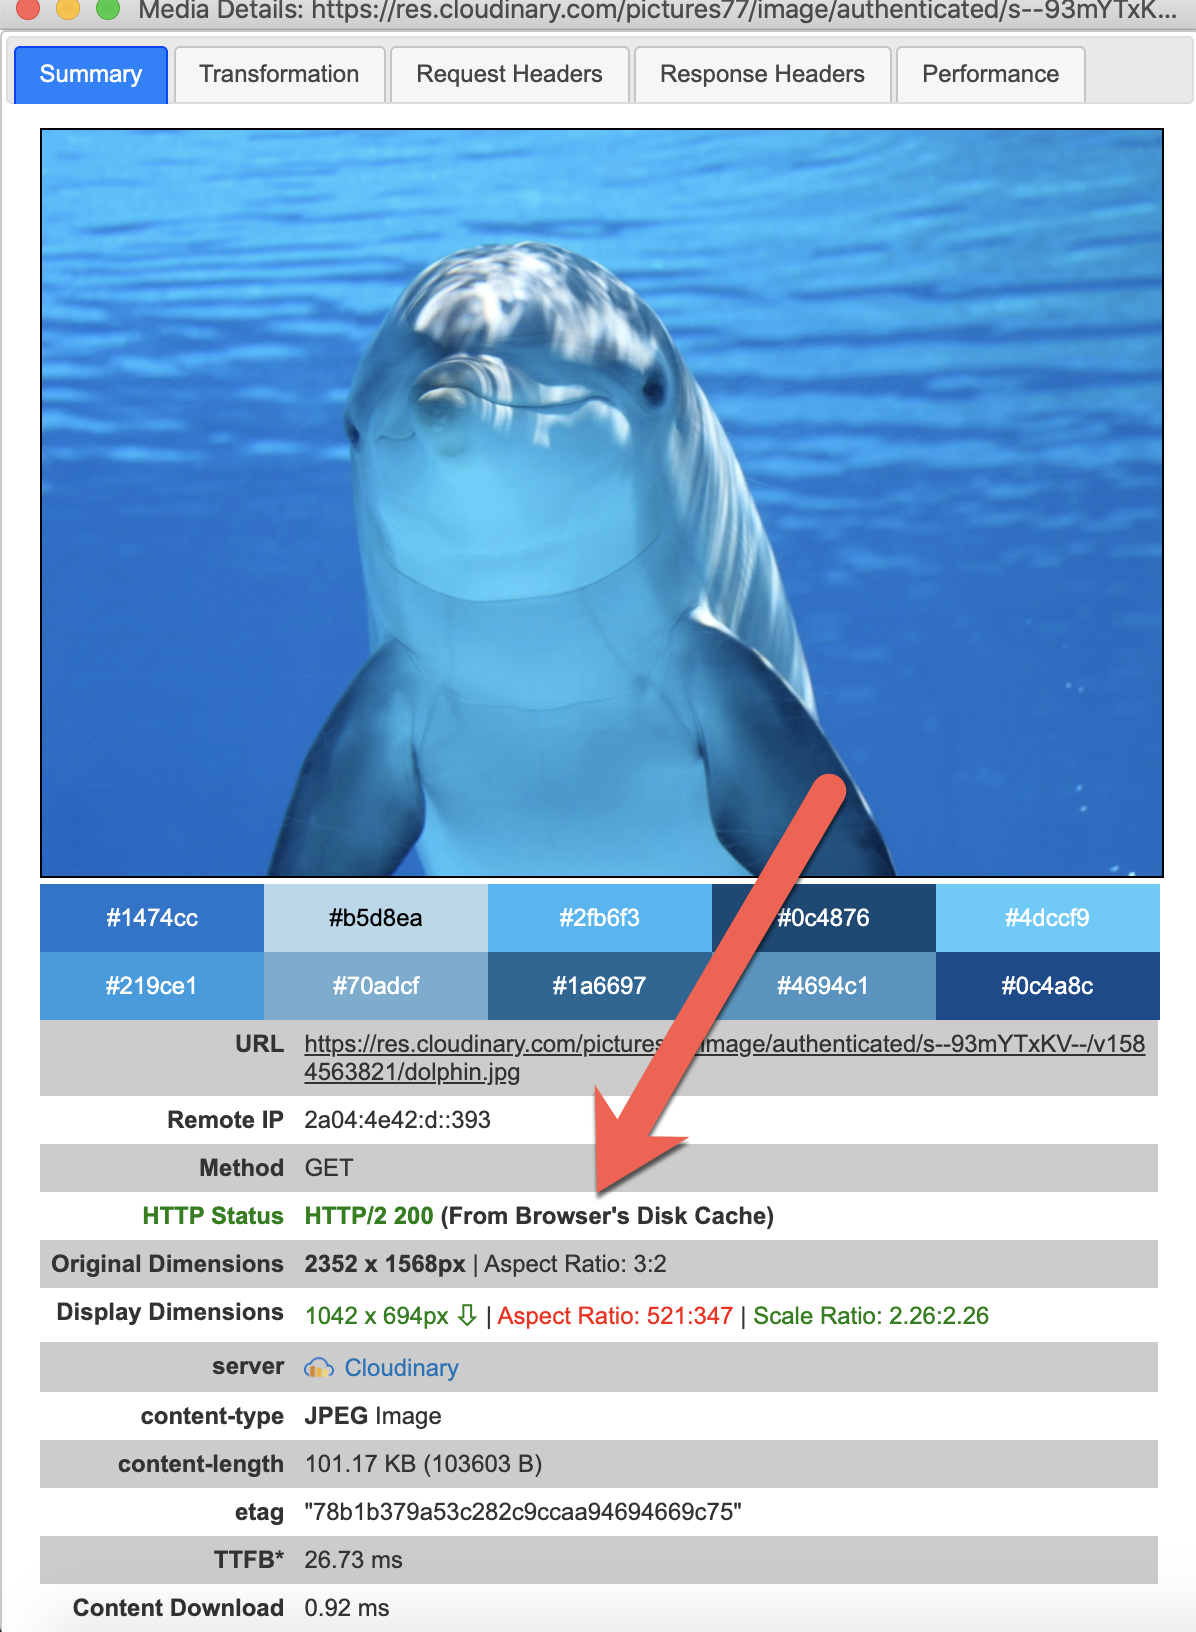
To avoid browser caching, you can
- check the disable cache and keep the chrome inspector open
- find an extension that prevents browser caching
- open your image requests incognito (Chrome) or private (Firefox)
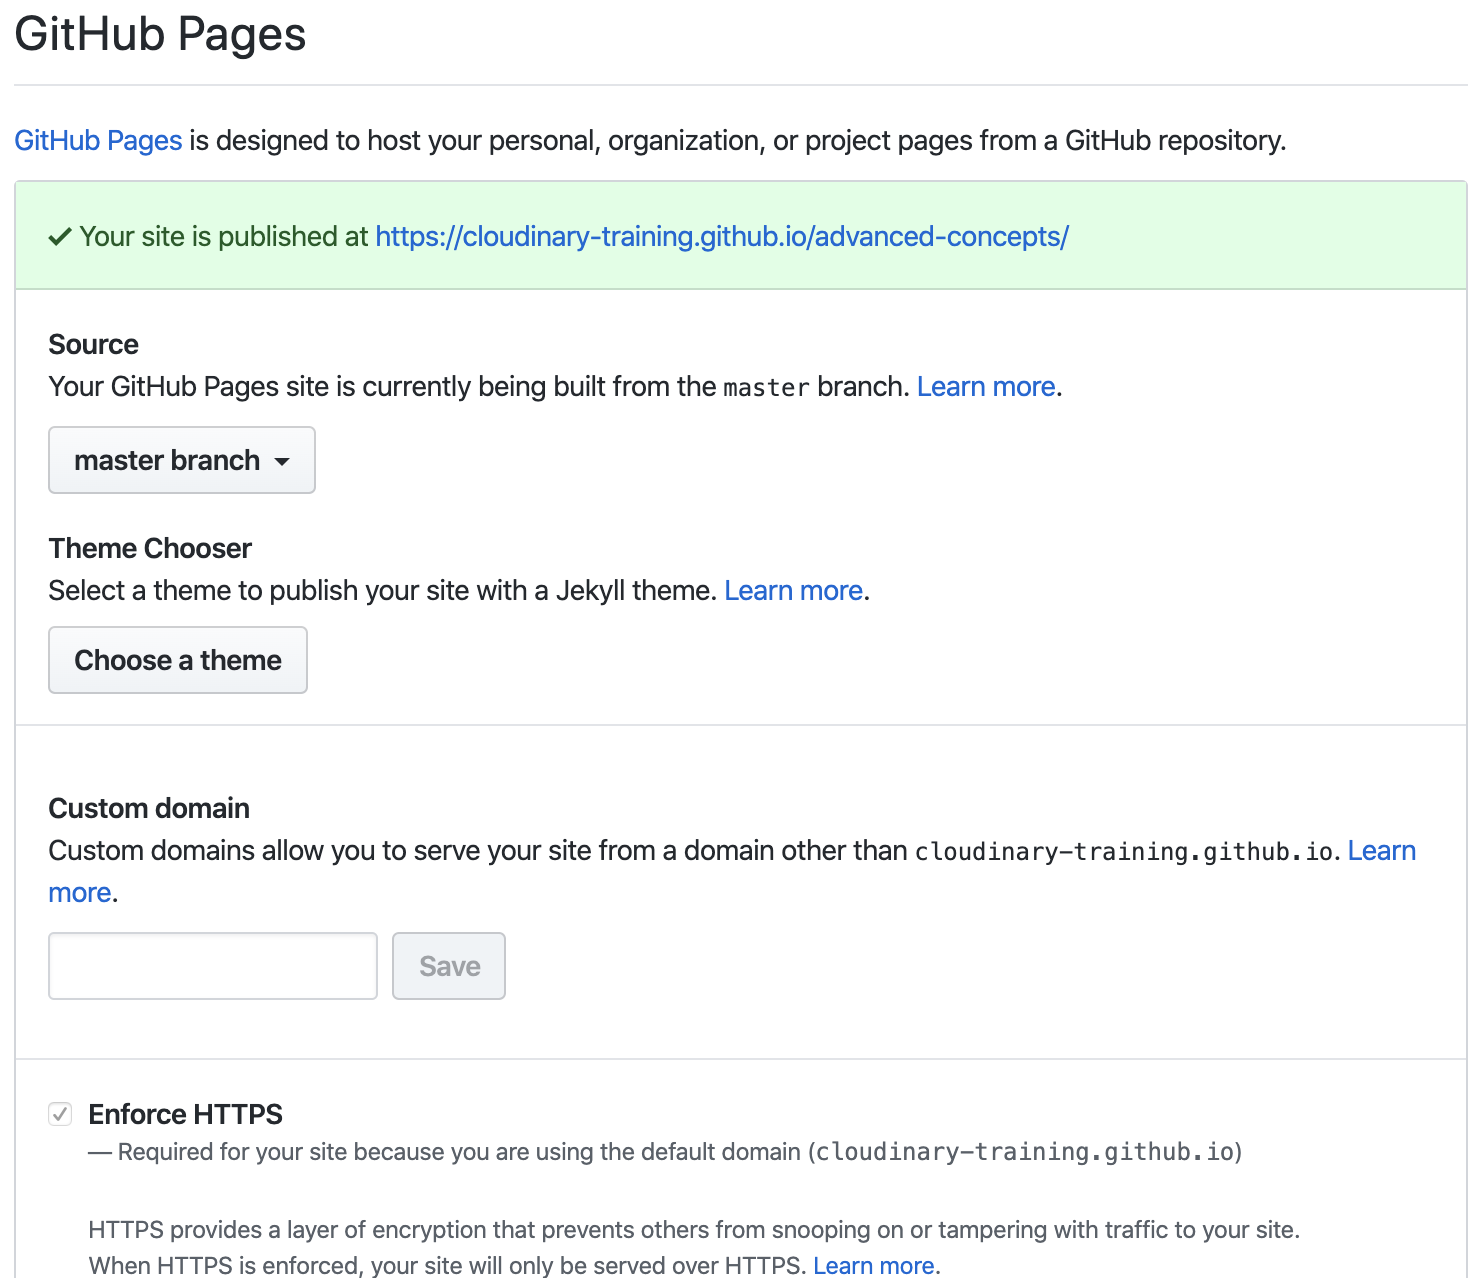
gh pages settings
In github.com settings: – Choose master branch for the source. – Click Enforce HTTPS if you have the option available. You can also serve assets from the training GitHub account: https://cloudinary-training.github.io/cld-advanced-concepts, for example https://cloudinary-training.github.io/cld-advanced-concepts/assets/images/dolphin.jpg.
VS Code Node debug
VS Code Node Debug: optional
Simple breakpoint debugging
– Enable Debug > Node: Auto Attach
– Set breakpoints
– In terminal node --inspect <filename>

Cleanup
If you want to remove all assets from your cloud that were uploaded in this course,
you can find cleanup scripts in the /utils directory
Using prettier in VS Code
This repo uses prettier for formatting. If you’re using Visual Studio Code you can add the prettier extension. You can also rename the .prettierrc.suggest to the hidden file .prettier to use the rules followed in formatting the code in this repo.
Contents of .prettier below
{
  "singleQuote": true,
  "tabWidth": 2,
  "semi": false,
  "arrowParens": "avoid",
  "space-before-function-paren": true
}
eslint fix
https://debugah.com/eslint-failed-to-load-config-standard-to-extend-from-21531/